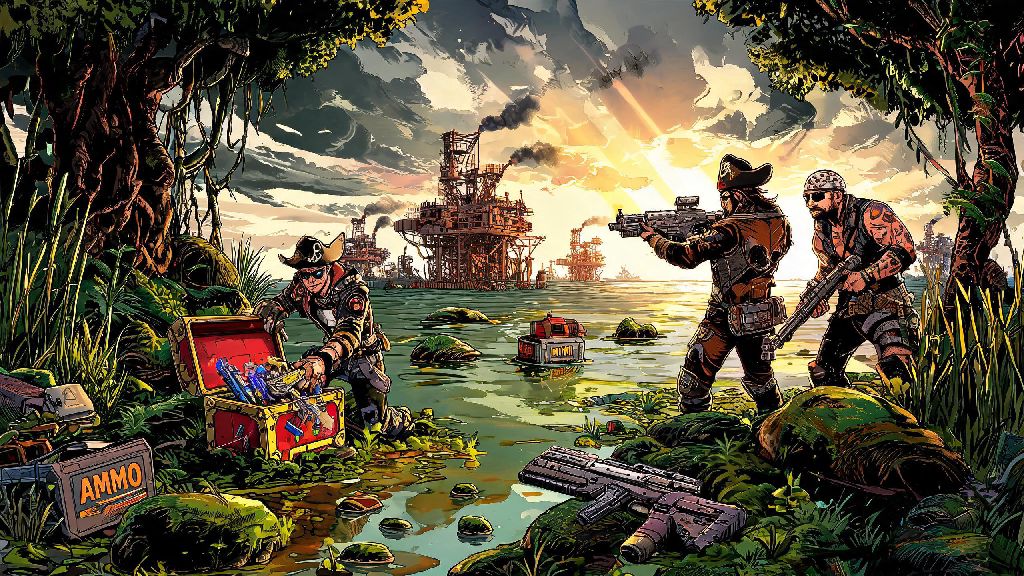
If you’ve spent any time roaming the chaotic, loot-filled wastelands of the latest Borderlands entry, you’ve probably already heard rumors of the sun-scorched, waterlogged coastal region known as the Splashzone Borderlands 4 map. It’s one of the most unique areas Gearbox has ever added to the franchise, mixing swampy tide pools, rusted offshore oil rigs, and a whole new faction of pirate-themed bandits that will shoot first and ask never. I spent 12 hours grinding this region over launch weekend, and I’m breaking down every secret, tip, and trick I found so you don’t waste time wandering in circles or missing out on rare legendary drops. You won’t find any filler here, just actionable info to get the most out of your time in Splashzone.
What Makes the Splashzone Borderlands 4 Region Unique?
Unlike the arid deserts and industrial complexes that make up most of Borderlands 4’s map, Splashzone leans into a messy, coastal swamp aesthetic that feels fresh for the series. The biggest draw here is the dynamic tide cycle that shifts every 10 minutes, completely changing which areas are accessible and what enemies you’ll face. The region is also home to the Salt Devils pirate faction, a ragtag group of bandits that modified their weapons to use corrosive salt water instead of regular ammo, making them far more dangerous than regular goons you’ll find inland.
There are a handful of mechanics that only exist in this region, so it’s worth familiarizing yourself with them before you jump in:
I was caught off guard by the tide cycle on my first run, I was halfway through looting a hidden cave when the water started rising, and I had to fight my way out against a swarm of underwater stingers before I drowned. Don’t make that mistake: keep an eye on the tide counter in the top right corner of your screen whenever you’re exploring low-tide only areas. If you see it drop below 2 minutes, wrap up what you’re doing and head for higher ground, or you’ll end up wasting a respawn.
Top Hidden Loot Spots in Splashzone
One of the biggest draws of the Splashzone Borderlands 4 map is the huge amount of exclusive loot you can only find here, from rare class mods to unique legendary weapons. I tracked down every hidden chest and secret farm during my playthrough, and these are the spots you should prioritize first.
The first spot is the abandoned lighthouse on the northeast edge of the region. It’s only accessible at low tide, when the broken stairs leading up to the top are exposed. The golden chest at the top has a 30% chance to drop the Tidal Wave shotgun, a Hyperion exclusive that fires 8 corrosive pellets that bounce off water surfaces, making it perfect for clearing out groups of Salt Devils. I got mine on my third run of the lighthouse, and I’ve been using it ever since for close-quarters fights in wet areas.
Next, head to the sunken oil rig platform that only becomes accessible during high tide. You’ll need to use the boat spawn point at the north end of the region to get out there, and once you’re on the rig, look for a secret room behind the main control panel. The room holds 3 purple chests and a 15% chance to spawn the Waterlogged class mod, which boosts corrosive damage by 40% for Siren and Gunner players. The room is hidden behind a breakable wall, so you’ll need an explosive weapon to get in. The third hidden spot is the small cove on the west side of the region, behind a rock wall covered in glowing blue moss. Blow up the wall, and you’ll find a fishing spot that only spawns the legendary Razorfin fish, which gives you a permanent 5% movement speed boost when you turn it in to the Splashzone fisherman NPC.
How to Beat the Splashzone End Boss, Captain Saltspit
Captain Saltspit is the leader of the Salt Devils, and the hardest exclusive boss in the Splashzone Borderlands 4 region, so don’t feel bad if you wipe a few times on your first attempt. He only spawns at the oil rig during high tide, after you’ve completed all 3 side quests in the region, and he has three distinct phases you’ll need to navigate to beat him.
In the first phase, he stays on the ground and fires corrosive water blasts from his handheld cannon that leave damaging puddles on the floor. Don’t stand in these puddles for more than a second, they drain 20% of your shield per tick even if you have a corrosive resistance mod equipped. He also summons two low-level goons every 10 seconds, so focus on clearing those first before you burn down his health bar.
Once you get his health down to 60%, he jumps onto a small speedboat and starts firing explosive cannonballs at you from the water. The gas tank on the back of his boat is his weak spot during this phase: hit it with a couple of explosive rounds, and he’ll be stunned for 5 seconds, giving you time to dump all your ammo into his health bar. If you’re playing solo, keep moving during this phase to avoid the cannonballs, they do enough damage to one-shot most non-tank builds.
When his health hits 20%, he jumps back onto the rig and switches to a melee hook that pulls you toward him if you get within 20 feet. If you get pulled, use your action skill immediately to break free, or he’ll hit you with a one-shot melee attack. Bring incendiary weapons for this fight, most Salt Devils units are weak to fire, and it cuts through Saltspit’s armor 2x faster than corrosive or shock damage. If you beat him on Mayhem 10 difficulty, you have a 25% chance to get his unique legendary rocket launcher, the Saltspit Cannon, which fires corrosive water rockets that leave damaging puddles across the battlefield.
Splashzone Co-op Tips for Smooth Runs
If you’re running the Splashzone Borderlands 4 map with a full group of 4 players, you can unlock a special secret side quest that only triggers when all players are in the region at the same time. But even if you’re just playing with one friend, these tips will help you get more loot and avoid frustrating wipes.
First, split up during low tide cycles. The tide timer is the same for everyone in the group, so you can cover 3x more ground and find far more hidden loot caches before the water rises. Just make sure you have a way to ping each other if you find a rare chest or a tough enemy, so you don’t miss out on good drops. It’s also smart to assign roles before you start: have one player with a long-range sniper to take out flying stingrays that spawn during high tide, have one tank build to draw aggro from heavy Salt Devils units, and have one support player to revive anyone who goes down in underwater areas, where it’s hard to maneuver.
One of the most underrated co-op tricks for Splashzone is that only one player needs to catch the legendary fish for the whole group to get the permanent movement speed boost. So instead of all four of you wasting 20 minutes grinding the fishing minigame, have one player focus on fishing while the rest of the group clears nearby bandit camps. You’ll save a ton of time, and everyone gets the same reward. Also, don’t drive vehicles into shallow water during high tide, they get stuck immediately, and you’ll have to abandon them. I learned that the hard way when my truck got stuck in a tide pool and I had to run 10 minutes back to the nearest fast travel point with a backpack full of loot.
Splashzone is easily one of the most fun, rewarding regions in the entire game, and it’s absolutely worth spending a few extra hours exploring if you’re chasing rare gear or just want to experience one of the most creative areas Gearbox has ever built. Whether you’re playing solo or with friends, the tips I’ve laid out here will help you get the most out of your time in the Splashzone Borderlands 4 map without all the frustrating trial and error I went through on my first run. If you find any hidden spots I didn’t mention, feel free to drop them in the comments below to help other players out.