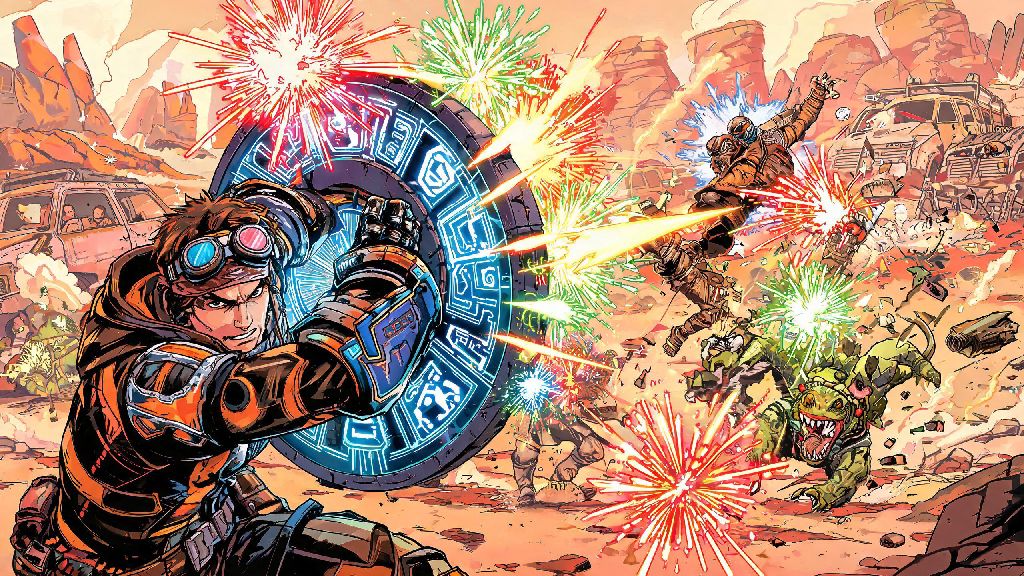
I’ve sunk over 200 hours into Borderlands 4 since launch, and I’ve tested almost every legendary shield in the game at this point. Most gimmicky, joke-themed items end up being useless for endgame content, so I almost skipped over the firework shield when it first dropped for me during a random Disco Inferno boss run. I figured the flashy rockets were just for show, until I accidentally let my shield break mid-wave in a Mayhem 10 Proving Grounds run and watched the rockets wipe 12 enemies in under two seconds. It’s quickly become my go-to shield for almost every build I run, and I’m shocked more players don’t talk about how overpowered it can be when used correctly.
Where to Farm the Firework Shield in Borderlands 4
The firework shield is a legendary Maliwan shield, so you can technically get it as a random world drop from any level 50+ enemy, loot chest, or slot machine in the game. But farming world drops is a huge waste of time if you’re specifically looking for this shield, since there are thousands of legendary items in the drop pool. Do not farm this shield on Mayhem levels lower than 8, because the base stats will be too low to hold up in endgame content, even if you get a perfect roll. You’ll want to farm at Mayhem 10 or 11 for the highest possible stats and drop rates.
The dedicated drop source for this shield is Pyro Pete Jr., the final boss of the Disco Inferno side mission in the Neon Slums zone. You can unlock this mission after you beat the main story campaign and reach level 45. The boss fight is pretty straightforward: Pete has three phases, and he only uses incendiary attacks, so if you have incendiary resistance gear, you can tank most of his shots easily. The base drop rate for the shield is 7% on Mayhem 10, and 12% on Mayhem 11 if you have the full 5 stack loot luck buff active from completing daily challenges.
There’s also a red chest right behind Pete’s spawn point that you can open after beating him, and it has a 3% higher drop rate for the shield than the boss himself. If you’re farming efficiently, you can run the entire fight, open the chest, and quit to the main menu in under 3 minutes per run. That means you can get at least one copy of the shield in around 20 runs on average, which is way faster than farming random world drops. If you’re playing co-op, you can also ask teammates to trade you a duplicate if they get one, since most players sell this shield by mistake when they first get it.
Core Perks and Unique Mechanics of the Firework Shield
At first glance, this shield looks like a standard Maliwan nova shield with a silly visual effect, but it has a ton of hidden mechanics that make it far more powerful than almost any other nova shield in the game. The base perk is that when your shield breaks, it launches 12 homing incendiary fireworks that automatically target the closest enemies within a 30 meter radius. Each rocket deals 150% of your total shield capacity as damage, and they have a base 30% chance to ignite any enemy they hit for 5 seconds of damage over time.
When your shield is fully charged, you also get two passive buffs: a 15% movement speed boost, and a 10% incendiary damage boost to all weapons you have equipped. That might not sound like a lot, but the movement speed buff stacks with other movement perks from class mods and anointments, so you can get up to 40% extra movement speed just from this shield alone. The incendiary damage boost also stacks with all other elemental damage perks, so it’s perfect for elemental-focused builds.
Most players miss a few hidden perks that make this shield truly overpowered. I’ve tested these myself across dozens of runs, so I can confirm they work consistently:
There are a few downsides to keep in mind too. The firework shield has 10% less base capacity than other legendary Maliwan shields of the same level, so you can’t face tank high damage sniper shots or rocket blasts like you can with a standard high-capacity shield. The firework rockets do friendly fire damage in co-op, so you have to be careful not to break your shield right next to low-health teammates, or you’ll accidentally down them. I’ve made that mistake more than once during raid runs, so trust me on this one.
Best Build Pairings for the Firework Shield
This shield works with almost any build, but it shines the most on elemental and mobile builds that can take advantage of its passive buffs and shield break effect. First, it’s perfect for any Siren build focused on elemental damage. The Siren’s elemental damage perks stack with the shield’s incendiary boost, and the shield break cooldown reduction perk from the Siren’s skill tree lets you trigger the fireworks 20% more often than other classes. I run this on my elemental Siren build, and I can clear entire waves of enemies in the Proving Grounds just by letting my shield break once.
It also works really well for Gunner builds focused on mobile, run-and-gun play. The 15% movement speed buff when the shield is full lets you reposition faster during boss fights, and the fireworks clear all small adds while you focus your heavy weapon fire on the boss. If you’re running a Gunner build with the automated turret skill, the incendiary boost also applies to the turret’s damage, so you get extra damage from that too.
When it comes to weapon pairings, you’ll want to stick to incendiary weapons to stack the ignite effects. The Volcano SMG, Rage Incendiary Shotgun, and Hellfire Rocket Launcher are all great options, since they apply extra ignite stacks that work with the shield’s ignite perk. You can also pair it with a high damage melee weapon if you’re running a melee build, since the movement speed buff lets you get close to enemies faster, and the fireworks clear any adds around you while you focus on melee hits.
Avoid pairing this shield with cryo-focused builds, because cryo effects cancel out ignite effects. If you freeze an enemy, any ignite stacks on them will disappear immediately, so you’ll lose half the shield’s damage potential. It’s also not a great pick for tank builds that rely on high shield capacity to face tank damage, since this shield has lower base capacity than other options.
Advanced Tips to Maximize the Firework Shield's Effectiveness
Once you’ve got a good roll of the shield, there are a few tricks you can use to get way more value out of it than just waiting for enemies to break your shield. First, you can intentionally break your shield by shooting a low damage explosive at your feet if you’re surrounded by enemies. I usually carry a weak Tediore grenade with a 0 fuse time for this: I throw it right at my feet, it breaks my shield, the fireworks wipe all the surrounding enemies, and my shield recharges in a couple of seconds. Just make sure you don’t use a high damage explosive, otherwise you’ll down yourself before the fireworks even go off.
If you’re fighting a boss that summons adds frequently, save your shield break for when the boss spawns a full wave of adds. The fireworks will wipe all the adds in one go, so you don’t have to waste time shooting them, and you can focus all your damage on the boss. This is especially useful during raid fights, where adds can overwhelm your team if you don’t clear them fast enough. I’ve used this trick to beat the final raid boss on Mayhem 11 in half the time my old build took.
You should also pair the shield with a shield recharge delay relic, which cuts the recharge delay by 30% after your shield breaks. That means you can get the passive movement speed and incendiary damage buffs back much faster, and you can trigger the fireworks more often if you’re taking consistent damage. If you can find a relic that also gives incendiary damage resistance, that’s even better, since it lets you take more incendiary damage without breaking your shield early when you don’t want to.
Always prioritize versions of the shield with the "fast recharge" anointment, which cuts the recharge delay in half. This is the best possible anointment for this shield, and it makes the loop of breaking your shield, triggering fireworks, and recharging almost instant. You should also look for rolls with extra incendiary damage and higher rocket count, which can bump the number of fireworks from 12 to 16, giving you even more crowd control power.
One last tip: if you’re playing on Mayhem 11, the shield’s rocket damage gets a 2x buff from the Mayhem modifier that boosts elemental damage. That means each rocket deals 300% of your shield capacity as damage, so you can one-shot most regular enemies even at max level. It’s one of the few shields that actually gets more effective as you turn up the Mayhem level, which makes it perfect for endgame grinding.
If you’ve been sleeping on gimmick legendary items in your playthrough, the firework shield in Borderlands 4 is one you should absolutely seek out. It’s fun to use, surprisingly effective for both casual runs and high-level endgame content, and works with a huge range of popular builds. You don’t have to grind for dozens of hours to get it either, just a few runs of the Disco Inferno boss fight will usually get you a usable roll, even if you don’t have max loot luck. Next time you’re looking to shake up your build and add some chaotic, crowd-clearing power to your loadout, give this shield a try – you won’t be disappointed.